Showing posts with label foodstuff. Show all posts

Sunday, February 20, 2011

Home Cooking

Cooking during weekdays are usually done by the house helper that we have.  But during weekends, Sundays for that matter, I try to do the cooking myself.  Today, the little one requested for "pansit na walang sabaw" or Pancit Canton.  I read a recipe of it at this site which I frequently read.  The Lo mien with soy and lemon sauce is so easy for the ingredients are readily available and can be found in your pantry.  

I made some adjustments in the recipe like substituting soba noodles for the egg noodles as that was what I had on hand.  Also, I made it into a vegetarian pansit as I did not put in the meat.  I don't think that those two things that I adjusted made a huge difference for the sauce is the same.

Pansit na walang sabaw
  
Head on to her site to get the recipe.


Monday, October 11, 2010

Another Roadtrip

It was an impromptu one. We just grabbed a Tupperware-full of oatmeal cookies, an adequate supply of milk and water for the kiddos, extra diapers and shirts, a few toys and we were off.  We really did not have anything in mind as to where we were supposed to go. It was a toss-up between San Remegio, which is north of the city and Moalboal, which is in the southern part.  In the end, it was the trip down south that won. We took the Carcar-Barili-Moalboal route which was a blessing in disguise because we passed by this small roadside stand that I have been reading about in many blogs.


Since it was almost lunch time, we decided to eat lunch there as well.  Their food offering was limited as they only had, longaniza, ngohiong, chicken adobo, and puso.  They had however a lechon stall where you can buy by the kilo.

The place had several wooden tables and chairs where you can sit down, eat and watch the cars and buses go by.  We were lucky because the weather was cool so it was a nice experience eating outside.  The kiddos were distracted by the metal slide that was near our table so the husband and I had to take turns eating so that someone will be watching over the kids as they play.


We reserved the dessert for later. I believe this roadside stall is well known for their fresh milk, fresh milk ice cream and frozen yogurt.  We had mango and chocolate ice cream and a cup of frozen yogurt. Their goodies are already packed in small plastic cups including the frozen yogurt. The flavors available for their ice cream that day was chocolate, mango, buko pandan, and vanilla.


Frozen Yogurt

Chocolate
Mango

The chocolate lacked the full chocolate flavor and the mango had that fake mango taste.  But both were creamy and milky.  The winner of the bunch was the frozen yogurt.  It was creamy, tangy and had the perfect sweet and tangy balance. I would come back to this place just for it. We were not able to taste their fresh milk so we really have a reason to go back. 

Molave Milk Station
Carcar-Barili Highway
Cebu

Tuesday, October 5, 2010

Potato Croquettes

After reading this blog entry made by La Fuji Mama, I was reminded of a similar thing I do whenever I have several potatoes in the vegetable bin.  This is a very versatile dish wherein you can put anything.  I already made it with ground beef flavored with taco seasoning and it came out really great!  I have not tried it with cheese though like the one made by La Fuji Mama but I think I will soon.  Looks tasty eh?  It bet it is.

Potato Croquettes with Corned Tuna

3 medium sized potatoes
1 can Corned Tuna
Panko bread crumbs
Salt
Pepper
Pinch of Curry Powder
2 eggs
seasoned flour (flour+salt+pepper)

1.  Boil potatoes in water until they are tender.  Drain and peel. Mash with a fork or a potato masher.  Set aside to cool
2.  Add the corned tuna to the potatoes and mix well
3. Season with salt, pepper and the curry powder.
4.  Add about 1/4 cup of dry breadcrumbs to the mixture
5.  Shape into small patties and refrigerate.
6.  Place seasoned flour, beaten egg, and panko bread crumbs in three separate bowls.  
7.  Dredge in flour, dip in egg, coat with bread crumbs. Repeat this step until all patties are done.
8.  Refrigerate or place in freezer for about 15 to 30 minutes
9.  Heat oil till it's hot, about 370F.  Make sure you have enough oil to deep fry or not to fry the patties on one side.
10.  Fry the patties by batches till it's golden brown on one side then flip to do the other side. 
11.Drain on a cookie sheet lined with paper towels to absorb the excess oils.
12. Serve while it's hot.

Potato Croquettes

*as always, I do not endorse a particular tuna brand. 


Monday, October 4, 2010

Cheesy Tuna Paella Balls

This is another experiment that turned out to be a hit.  I had a can of the San Marino Tuna Paella sitting in my pantry for quite some time now.  I figured it would be boring to eat it straight out of the can so I thought of a way to enhance it.  Just to clear things out, I am not an endorser of this brand nor was I paid to write about it.

Cheesy Tuna Paella Balls

1 Can San Marino Tuna Paella
Cheese (I used Eden Filled Cheese)
1 Egg
1/2 cup flour
1 cup panko bread crumbs
Salt
Pepper
Oil for frying

1.  Combine flour, salt and pepper in a plate. Set aside
2.  Slice cheese into cubes
3.  Place tuna paella in a bowl
4.  Beat egg in a bowl
5.  Prepare dredging station by placing the plate of the seasoned flour, bowl of eggs and plate of breadcrumbs side by side.
6.  Get a spoonful of tuna paella and put cheese in the center covering it entirely with the rice.
7.  Dredge in flour then in eggs then in breadcrumbs.  Repeat this step until all of the tuna paella is consumed.
8. Put in freezer for about 10m minutes to help the breadcrumbs set.
9.  Heat oil in a deep pan. Make sure it is enough to deep fry the rice balls.
10.  When the oil is hot enough, fry the tuna paella balls until golden brown.
11.  Drain excess oil by placing the fried ones in a plate lined with a paper towel.
12.  Serve while hot.

Tuna Paella Balls

* I served this with sweet chili sauce on the side.

Creamy Corned Tuna Pasta

This is one of those pasta experiments that I did.  It was a spur of the moment thing as I just had to satisfy my craving for pasta.  It is very easy to make and the ingredients are readily available.

Creamy Corned Tuna Pasta

200g Uncooked Pasta (Spaghetti/Linguine/Fettuccine/Zitti - whatever you prefer)
1 can Corned Tuna (Century or San Marino - whatever brand you prefer)
1 small can button mushrooms, sliced
1 red bell pepper, diced
garlic 
onions
1 tetrapack cream
pasta water
salt
pepper

1. Boil pasta according to package directions.  Set aside
2. Saute button mushrooms. 
3.  Add onions and garlic
4.  Add bell peppers and saute till fragrant
5. Add corned tuna.  
6.  Add cream
7.  Thin the mixture out a bit with the pasta water.  Add the water a little at a time till it reaches your desired      consistency.
8.  Season with salt and pepper to taste.
9.  Add cooked pasta and mix with the sauce.
10.  Sprinkle with grated cheese.
11.  Serve while it's hot.

Creamy Corned Tuna Pasta

*To make it a bit spicy, sprinkle a bit (or a lot) of crushed red pepper to the sauce before adding the pasta.  I added it after it was cooked as the kids are not yet used to spicy foods.

Monday, September 6, 2010

Durian Pie

I had a stash of frozen durian.  I had to think of other ways to eat it as eating fresh durian was becoming too common for us. The husband suggested that I make a pie.  It's been ages since I last made a pie.  It was my one and only attempt in making one.  So I had no recipe for a pie crust that I could use.  Of course, the Internet being my source of all information, I immediately searched for a pie crust recipe that is easy and no fuss.

I found one in allrecipes.com that said no-roll pie crust.  It seemed easy to do and the ingredients were all on hand.  I was out of butter so it was the perfect recipe for me to try out.   I pre-baked the crust first as recommended by some of those who have tried the recipe.  I always check on the comments whenever I use a recipe from the Internet.  The information you get from reading the comments will really help you get the perfect recipe.

For the filling I used 3 ingredients: durian flesh, sugar and cream.  I only eyeballed the proportions that is why I had some extra filling after filling the pie crust.

This went to the oven for about 30 minutes at 350 degrees.

Durian Pie

A Slice of Pie

Not bad for my second try in making pie eh? :D  

Thursday, August 26, 2010

What's Keeping Me Busy

Family, kids and work are the things that has been keeping be busy lately.  That's why I have not been able to update this blog for a few days now.  Being a full time stay at home mom or SAHM as I call it can be as demanding as having a 9-5 job. How can it not be when I have 3 bosses demanding equal if not more time and attention. Sigh... Sometimes I just have to shout it out to let the stress out.

But things might change soon although nothing final yet.  I'm keeping my fingers and toes crossed though.  I think this change will help all of us. =)

Here are some pictures of some of my food finds here in Cebu.  This is from a small bakeshop downtown.  Their best sellers are the mango cream pie, chicken pie and sylvannas.
Chicken Pie

Mango Cream Pie
I have tasted both pies but not the sylvannas. I'd choose the chicken pie over the mango cream pie.  The crust is more buttery and flaky and its more filling too.  You can really see and taste the chunks of chicken, potatoes, raisins and corn and with the hint of curry to bind it altogether. I could eat a couple of the pies in one sitting!  Thinking about it makes me hungry.  The shop has other goodies too like moist chocolate cake, brazo de mercedes, cupcakes, breads and many more.  Although some of the items I think you have to order in advance.  Sorry for the crappy photo. It was taken by my camera phone.

display case
Crema
Kamuning Street 
(at the back of Cebu Doctors Hospital Parking Lot)
Cebu City

Friday, August 20, 2010

pictures of past dinners

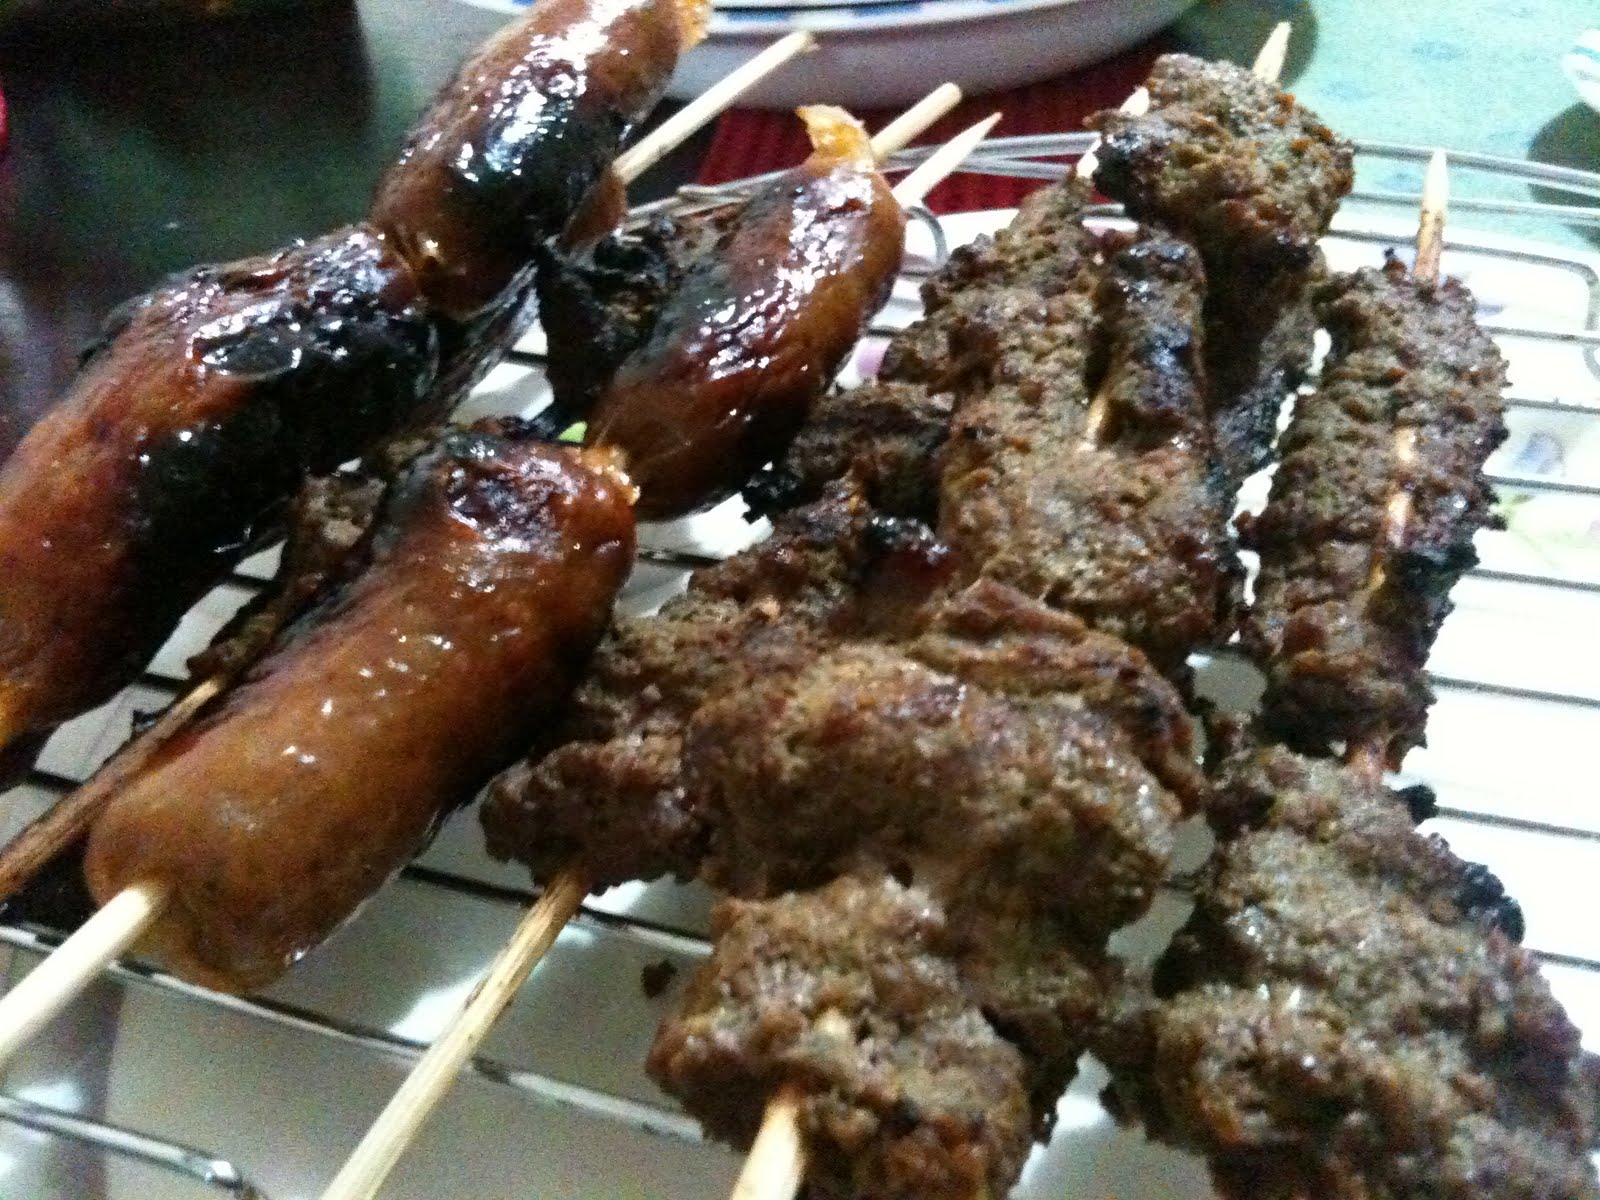
Inihaw na Chorizo & Beef Satay

Peanut Sauce for the Satay

Chicken Arroz Caldo

I was not able to take pictures of the Pork with Spinach Odong Noodle Soup as well as the Chicken with Spinach Misua Soup. 

Will be leaving you with these pictures for the moment.  I have to take care of my two kiddos first.


Tuesday, August 17, 2010

the peanut sauce experiment

I cook when I'm stressed out.  Somehow it helps me calm down.  Tonight became another night of cooking for me.  One the menu for today:

Lunch:  Beef Stir-Fry with Eggplants and Cauliflower
Dinner:  Chicken Arroz Caldo (with lots of fried garlic bits)
             Beef Satay with Peanut Sauce
             Inihaw na Chorizo

Lunch was ok. It would have been better if we got a tender cut of beef. Bought the local beef from Rustan's Supermarket and boy it was TOUGH!!!!  When will I ever learn????  Everytime I buy beef from them, it always comes out tough when cooked.  I don't know if it's my cooking method or their beef.  Anyhow, I will try to stay away from them from now on. 
On to dinner.  I don't expect the Beef Satay to be tender because it came from the same source as the beef used for lunch's stir fry.  I used an instant marinade. It smelled good though.  To pair with it, I made peanut sauce for dipping. I used the receipe found here.  It is easy to do and no cooking required. It's not the same satay sauce that I know from my memory but it will do.  I think I will have enough left-over for me to whip us Peanut-Sesame noodles.  I still got a pack of soba noodles waiting to be used. 
Pictures to follow. 

Monday, August 16, 2010

My First Attempt in Cheese Making

Success!  Yup.  That is how I will describe my first try at cheese making.  As I shared in this post,  I have long wanted to try making cheese at home.  There are many who have been successful in their cheese making activities at home and it is a proof that it could be done. You just have to browse the web to find a recipe.

For this recipe, I used a 2% fat milk so I had to increase the amount of the cream that was called for in the recipe.  I also increase the amount of the acid and used vinegar instead of citric acid.  The original recipe can be found here.

Fresh Ricotta
Recipe:


1 Liter Low Fat Milk (2%)
5 Tablespoons Cream
1/2 Tablespoon Salt
2 Tablespoons Vinegar


Mix all ingredients in a sauce pan.
Heat it up over medium heat.  Mix once in a while to avoid scalding the sides.
Wait till the curds separate from the whey.  
When the mixture has separated, turn off the heat and let stand for about 10 to 20 minutes. 
Strain in a cheese cloth lined-colander.  
Let stand for about 10 minutes or longer if you want it dry.
Eat immediately.


Notes: 
I think I would have added the vinegar when the milk mixture was boiling instead of adding it at the beginning.  I did that in the second process and the curds developed faster.
Store in a jar or any clean container and place in the fridge when not going to eat right away.


Some say that the cheese that comes out from the method used in the recipe is not really ricotta because ricotta comes from the left over whey from making mozzarella.  Whatever they say, for me, it is cheese.  =)  Anyhow, since I got a lot of the left over whey from the first processing, I boiled it again and added a tablespoon of vinegar.  It's still cooling in the stove so I have yet to taste the curds that it made.

I can't wait to eat this tomorrow with hot pandesal. Yummy!

Experiment

I really wanted to experiment on this for a long time.  I had the chance today because I had a liter of milk that might just turn sour any day now.  In order to extend it's shelf life, I decided to try my hand in making Ricotta! =)  It's still heating up in the stove and is now way near curdling.  I think I might have to exercise my elbows for a an hour or so.

Ok.  I have to go back to stirring now.  Will post the results later.

Friday, August 6, 2010

Love the Cake

One of our favorite things to do is eat.  The husband is already complaining that he is getting fat because of this.  We love trying out new restaurants and cafes especially if there are good reviews written about it.  It is not the first time that the husband ate in this place but it was for me.  Its proximity to his office plus the cheap prices make it one of his preferred places to go to for lunch.  He has always raved about how good their chocolate cake was.

Even if today was a holiday here meaning no work and no classes for the kiddo, he still went to work because he had a few loose ends to attend to.  I went with him because I needed some peace and quiet time away from the kiddos to be able to finish all my assignments for the day.  I was given the opportunity to eat lunch at Chowabungga to see and taste for myself if the cake was indeed as good as the husband raved it to be.

Of course, before the dessert, we had to eat lunch first. Since this is a self service restaurant, we had to order at the counter first.  Good thing there was no one in the restaurant yet so I was able to take the time to read out and ask questions about their offerings.  They had the usual Pinoy fare of Silogs or Silletes as they call it.  The menu also included some Chinese, Korean, Mexican, Indian and Japanese dishes.  I settled for a beef Burrito and the husband had a Chowabongga Beef Bowl, which is what he usually orders when he is here.

Chowabungga Beef Bowl
The beef bowl's serving was quite small if you have a big appetite but with the cake, I think it will be a filling meal.  The taste was great.  I think it is even better than the beef bowl of Yoshinoya.  Lots of beef in it with a sauce that is quite sweet.  It would have been better if they had a togorashi on hand to give it some kick. I wish they added more rice to the serving.  But for the PhP 65.00 price, it is well worth it. 


Beef Burrito

The beef burrito was good too.   They used ground beef instead of strips. It was quite small if you are used to the size they have at Mexicali.  Flavor was OK but I prefer that they added more tomatoes and cilantro to it. Not at all bad for the PhP 65.00 price tag.  

The star of the show
The Chocolate Cake

The chocolate cake was indeed a discovery.  It was not cloyingly sweet with the right amount of chocolatey taste.  It had a possessed a good crumb- not to spongey nor too dense- just perfect. The frosting was something.  I could not well place it but it paired perfectly with the cake.  I think the chocolate buttercream frosting had cocoa powder in it because it had bitter tones to it.  It scored a home run for me especially that it only costs PhP30.00 per slice.  I consider it to be in my favorite chocolate cakes list.  

I think I will be back here more often. Makes me want to look for a job in any of the companies whose offices are in the area just so it will be accessible whenever I have the cravings.  If not, I'll ask the husband to buy me a slice or two of the cake every now and then. 
 
Chowabungga Fast Food
Asiatown IT Park
Lahug, Cebu City


PS.  All photographs courtesy of my lowly camera phone so pardon the quality. 

Tuesday, August 3, 2010

Finger Lickin' Good!

No, we did not have KFC for dinner tonight.  As I posted earlier, I was trying a new product that I saw in the supermarket this afternoon.

Included in the pack is the breading and the sauce for the chicken wings.  The pack says it is good for 500g of chicken wings. But I beg to disagree because I had about that much chicken and I ran out of the breading mix.  Good thing I bought 2 so I was able to finish breading all my chicken pieces.  But I think the sauce pack is enough.  It is also available in several flavors: Barbeque, Teriyaki and Screamer.

The result? Success!  We had chicken wings that could rival the ones we had in Chili's in Manila and New York Buffalo Wings in Lahug.

a plateful of goodness! Yummy!!!!

Now we do no have to go out of the house just to get these succulent sweet and really spicy chicken wings.  I just have to run to the nearest grocery store, which is luckily only a few minutes from our place, to buy me some chicken wings. 

Finger Lickin' Sarap to the Bones!

For added flavor, I brined the chicken in salt for about an hour before proceeding with breading it.  I think doing that extra step in necessary for the chicken meat to have flavor.

The product is highly recommended by me.  Especially if you are suddenly craving for spicy chicken wings.  

Disclaimer: I was not paid to review this product.  I just chanced upon it while doing my grocery rounds.

Trying out something new

I went to the grocery this afternoon after dropping off the kiddo in school. I was going thru the aisles when I saw this new product.  I have a hankering for buffalo wings lately so seeing the product made me giddy.  The wings are cooling off in the fridge to make the coating stick more.  I will update this later after it has been cooked.  Hopefully it turns out well.

Back to the kitchen for me....


UPDATE:

The results are in.... SUCCESS! It looks like I have found another pantry staple.

New Favorite

I love chocolates. I make sure that I have a stash of it hidden in my food cabinet.  I discovered this chocolate bar while waiting for my son in school.  I fell in love with it after the first bite.  My friends and I call it our new Tofi Luk. For those who do not know, Tofi Luk is another chocolate bar that is like a cheaper version of Twix.  We used to hoard them whenever we had the chance.

It is a chocolate covered crispy rice cereal, wafer, peanut butter bar.

Peanut Butter Flavor


The picture that I have here is their chocolate and peanut butter flavor.  They have it in milk chocolate, dark chocolate and white chocolate.  I have only tasted 2 variants- milk and peanut butter.  I personally prefer the one with peanut butter because I love how the sweet salty flavors vie for the attention of my taste buds.  A friend said that the dark chocolate flavor is good too.  

This is a cheap chocolate fix.  It will only cost you Php 5 if you buy it by bar and costs even lower when buying them by box (PhP 48.50).  This is available in the chocolate and candy aisle of your favorite supermarket. 


Thursday, May 27, 2010

Dried Fish with Squash and String beans in Coconut Milk

This is one of my favorite comfort foods. I even had to call up my mom for the recipe. Its fairly easy to do.  You would just have to have the muscle power to get the coconut milk and cream out of the grated coconut.  For an easier way, you can use canned coconut milk and cream however, nothing beats freshly squeezed coconut cream.

I did not have the exact measurements for the ingredients.  Just add more or less depending on your taste.

Squash
String beans
Onions
Garlic
Coconut cream
Coconut milk
Dried Fish
Salt
Pepper

Cube the squash into bite size pieces.  Set aside
Cut the string beans into manageable lengths.
Slice the onions and mince the garlic. Set aside
Wash the dried fish and slice it into two or three if you have a fairly large one.
Place into a pot the Squash, Onions, Garlic and dried fish then pour in the coconut milk about three fourths full.  Don't submerge everything in the milk unless you would want a soupy dish.
Season with a bit of salt and pepper.
Simmer until the squash is soft. 
Add the coconut cream and make sure that it does not boil so the mixture won't curdle. 
Add the string beans.
Simmer over very low heat.
Taste and adjust seasonings as necessary. 
Serve while hot with a bowl of steaming hot rice.

Enjoy!

Monday, April 26, 2010

Balamban Liempo

Need I say more?

The real Balamban Liempo in Balamban Cebu.
Christian's Liempo
A small stall near the public market that serves the best liempo!  Still tastes good after being reheated the next day. We will definitely go back for more of this.